A fine mist should leave the nozzle as a soft, even cloud. When it sputters, spits, or stops, dried product and mineral scale may be narrowing the tiny outlet. The cause matters. A quick rinse can help with fresh residue, while an overnight soak may be needed for stubborn deposits.
The Water Quality Association estimates that about 85% of U.S. homes have hard water, a common source of mineral buildup. The U.S. Geological Survey explains, “Water hardness is caused by compounds of calcium and magnesium, and by a variety of other metals.” That finding describes water—not sprayer nozzles specifically—so it should not be treated as a clogging-rate statistic. Still, it helps explain why a nozzle may crust over after repeated use, especially when droplets dry around its opening.
This guide covers How to clean a plastic mist sprayer nozzle at home, using warm water, gentle soaking, and careful flushing before considering stronger steps. Small details count. A pin can widen or damage the opening, and harsh solvents may affect some plastics. I could not verify a named nozzle-care expert’s exact quotation, so I will not invent one. That limitation is worth stating: nozzle designs and product formulas differ, and one cleaning method may not suit every bottle. Check the manufacturer’s care instructions, then test gently. The goal is a clear mist, not a perfect-looking nozzle.
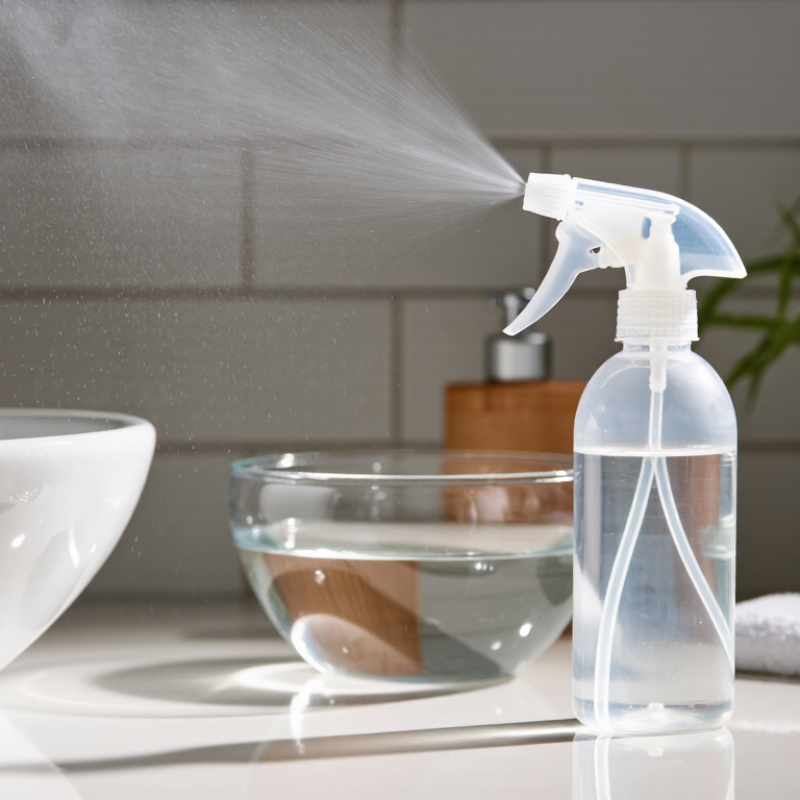
Plastic mist sprayers usually have an adjustable nozzle or a fixed fine-mist tip. An adjustable tip turns to change the spray from a narrow stream to a mist, or to close it. A fixed tip has one spray pattern and may be built into a removable head. Look closely at the front opening and the collar behind it. Don’t force anything; plastic threads can crack.
Check the bottle before blaming the nozzle. Fill it with clean water, make sure the dip tube sits below the waterline, and squeeze the trigger a few times. A healthy mist looks even and spreads across a small area. A partial blockage may cause spurting, a lopsided spray, or a thin stream. Drips from the tip can also be a clue. So can a trigger that suddenly feels harder to press, though a damaged pump can cause similar trouble.
I used to assume a weak spray meant a clogged tip. Not always. Air in the tube, a loose head, or low water can mimic a blockage. If the nozzle detaches easily, inspect its opening against a bright light. Dried residue may look like a tiny pale ring. Avoid poking it with a needle; even a small scratch can distort the spray. A soft cloth and warm water are gentler.
| Nozzle Type or Feature | Common Signs of a Blockage | Practical Cleaning Method | What to Avoid |
|---|---|---|---|
| Adjustable twist nozzle Usually turns between a fine mist and a more concentrated stream. |
Spray is uneven, comes out in a stream when set to mist, or stops changing when the tip is turned. | Remove the nozzle if it unscrews. Rinse the tip and opening with warm water, soak in warm water for 10–15 minutes, then flush with clean water. Refit and test with water. | Do not force a stuck adjustment ring or use pliers on plastic parts; either can crack the nozzle. |
| Fixed fine-mist nozzle Produces a spray pattern that is not adjusted by turning the tip. |
Fine droplets become large or irregular, spray is weak, or liquid exits from only one side. | Remove the nozzle assembly if possible. Soak it in warm water and gently flush from the inlet side. If residue remains, repeat the soak rather than scraping the spray opening. | Avoid pins, needles, and wire. The small opening can be enlarged or damaged, changing the spray pattern. |
| Nozzle with a removable filter or screen A small mesh or filter may sit behind the nozzle. |
Spraying improves briefly after pumping, then weakens again; visible particles may collect near the nozzle. | Unscrew the assembly carefully and check the filter. Rinse the filter and nozzle under clean running water. Reassemble in the original order and make sure the filter is seated correctly. | Do not discard the filter or push debris deeper into the pump. Avoid abrasive brushes that could tear the mesh. |
| Mineral-scale buildup More likely after repeated use with hard water. |
White or chalky deposits appear around the tip, and soaking in plain water does not restore the spray. | If the sprayer’s instructions permit it, soak the removable nozzle briefly in a dilute white-vinegar solution, then rinse thoroughly with clean water. Test with water before returning to normal use. | Do not use vinegar unless the sprayer materials and instructions allow it. Never mix vinegar with bleach or other cleaning products. |
| Dried product residue Can occur when liquid is left in the sprayer between uses. |
The trigger feels normal but the nozzle sputters, drips, or produces little or no spray. | Empty the container and rinse it. Fill with warm water, attach the sprayer, and pump until the water runs freely. Remove and soak the nozzle separately if the blockage remains. | Do not soak the entire trigger head unless its instructions say it is safe; water can enter parts that are not designed to be submerged. |
| Possible pump or intake problem The nozzle may be clear even when the sprayer does not work. |
No liquid comes out after the nozzle has been rinsed, or the trigger does not draw liquid consistently. | Check that the tube is attached, not kinked, and reaches the liquid. Refill with clean water and prime the pump by squeezing the trigger several times. | Do not keep pumping against a fully blocked nozzle or dismantle a sealed trigger head; replace the sprayer if a damaged component cannot be safely serviced. |
Before cleaning: Check the sprayer’s instructions and the liquid’s safety directions. Point the nozzle away from people, pets, and electrical equipment; release pressure and empty the container before removing parts. After cleaning, flush the sprayer with clean water and allow parts to dry.
Use warm water, mild dish soap, a small bowl, and a soft toothbrush. Keep a clean cloth nearby.
Soak it in warm, soapy water for about 15 to 30 minutes. Give it time.
No. Needles and metal pins can scratch the nozzle or widen its tiny opening.
Use diluted white vinegar for mineral deposits only if the sprayer’s care instructions allow it. Rinse thoroughly afterward.
Avoid boiling water. Excessive heat may soften or warp some plastic parts.
Reattach the dry nozzle and fill the bottle with clean water. Pump it over a sink and check for an even mist.
Check the nozzle alignment, seal, spring, and pickup tube. A blockage deeper inside may remain.
Repeat the gentle soak once, then inspect for cracks or wear. I sometimes expect a perfect mist immediately, but that may be unrealistic.
How to clean a plastic mist sprayer nozzle at home starts with identifying the nozzle type and checking for signs of a blockage, such as a weak, uneven, or missing mist. Gather simple household supplies, including warm water, mild soap, and a soft cloth. If the nozzle can be removed, detach it carefully and soak it in warm, soapy water to loosen dried residue without damaging the plastic.
After soaking, gently clear the nozzle opening with a soft brush or another non-sharp cleaning tool, then rinse all parts thoroughly with clean water. Avoid forcing anything into the opening, as this may damage it. Reassemble the sprayer, fill it as usual, and test the mist pattern. If the spray is still uneven, repeat the gentle cleaning and rinsing steps.

 Vikas Plastic