How to Clean a Plastic Mist Sprayer Nozzle at Home Easily?

Time:2026-06-13 Author:Mason
0%

Cleaning a plastic mist sprayer nozzle at home might seem daunting. However, it is a straightforward task that anyone can master. Understanding how to clean a plastic mist sprayer nozzle at home will extend its lifespan and improve its performance. Regular maintenance keeps the nozzle free from clogs and buildup.

Many people overlook this essential task. They might not realize that residue can affect spray patterns. A clogged nozzle could lead to uneven application of liquids. This not only wastes resources but can also damage plants or surfaces. Having a clean sprayer allows for efficient use, making every drop count.

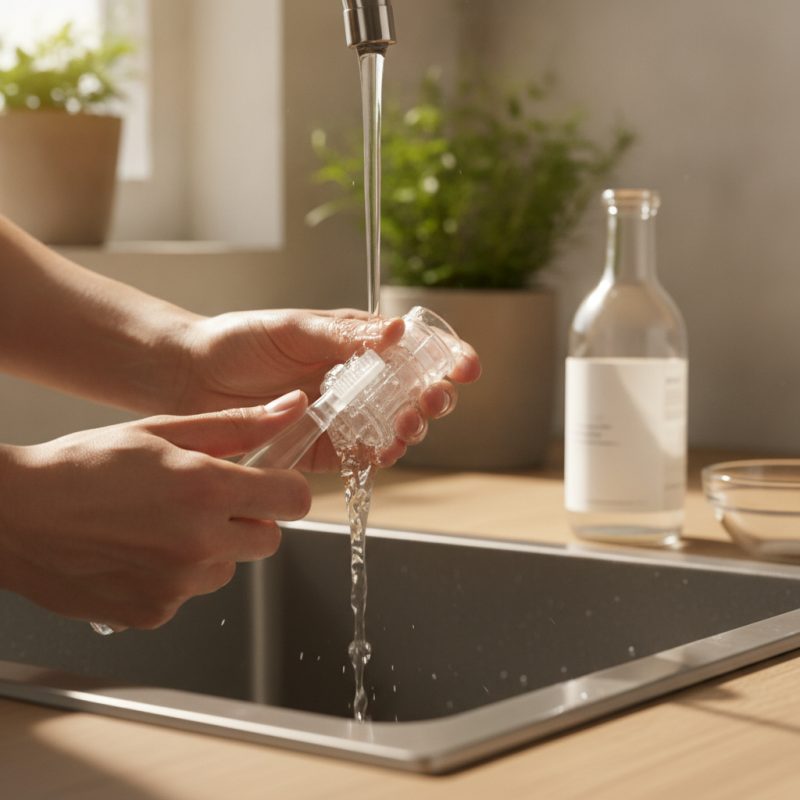
Using common household items, you can achieve remarkable results. Warm water, vinegar, and a soft brush are often all you need. These simple tools can effectively clear out grime. Yet, diligence is crucial, as neglect can lead to frustration later on. Taking the time to regularly clean your sprayer is worthwhile for both performance and longevity.

How to Clean a Plastic Mist Sprayer Nozzle at Home Easily?

Understanding the Importance of a Clean Plastic Mist Sprayer Nozzle

A clean plastic mist sprayer nozzle is crucial for optimal performance. A clogged nozzle can lead to uneven spraying, affecting your plants' health. According to the Journal of Agricultural Engineering, 40% of growers face issues due to improper nozzle maintenance. Regular cleaning not only improves spray patterns but also extends the nozzle's lifespan.

Tips for cleaning: Always soak the nozzle in warm water for about 30 minutes. This helps to loosen any debris or liquid buildup. Use a small brush to scrub gently. Make sure to remove all residue, as even a tiny blockage can alter the spray pattern.

Neglecting nozzle maintenance can lead to frustration. You might notice that your mist sprayer performs worse over time. Studies show that routine cleaning can improve efficiency by up to 25%. A clean nozzle ensures that you deliver the right amount of water and nutrients to your plants. Remember, it’s easy to overlook the small components, but they play a critical role in overall functionality.

Gathering Necessary Cleaning Supplies for the Task

Cleaning a plastic mist sprayer nozzle at home can seem daunting. However, gathering the right supplies makes this task manageable and effective. To start, you need basic cleaning agents such as warm water, vinegar, and baking soda. These items are often found in households and are both safe and effective. According to research by the Environmental Protection Agency, vinegar can eliminate 90-99% of bacteria. This is crucial for ensuring your sprayer nozzle is not just clean but also sanitary.

A small, soft brush is also essential. This allows you to reach tiny crevices that may accumulate debris. Often, the residue can solidify, making it harder to remove. A study by the Journal of Cleaner Production indicates that frequent cleaning can prolong the lifespan of such tools significantly. Rags or old cloths are useful for drying the nozzle after cleaning. Avoiding air drying helps prevent dust from settling in the newly cleaned area.

While these supplies are effective, not all might be available at the moment. Unexpected supply shortages can occur, and alternatives may be necessary. Rely on whatever you have at hand, but ensure safety and efficacy in your cleaning routine. Regular inspections of your sprayer nozzle can help catch buildup early. This proactive approach reduces long-term cleaning efforts and ensures optimal performance.

How to Clean a Plastic Mist Sprayer Nozzle at Home Easily?

Cleaning Supply Purpose Usage Instructions
Warm Water Loosens debris Fill a bowl with warm water
Dish Soap Cleans and degreases Add a few drops to water and mix
Small Brush Removes stuck particles Gently scrub the nozzle
Vinegar Disinfects and removes minerals Soak the nozzle for 30 minutes
Rag or Cloth Wipes down surfaces Use to wipe the cleaned nozzle
Alcohol or Acetone Removes paint or stubborn residues Dab on a cloth and clean the nozzle

Step-by-Step Guide to Cleaning the Sprayer Nozzle

Cleaning a plastic mist sprayer nozzle at home can feel daunting. However, it's essential for maintaining its efficiency. A dirty nozzle can lead to uneven spraying patterns and wasted materials. According to industry research, regular maintenance can improve sprayer efficiency by up to 20%. This can save you both time and resources.

Start by disassembling the nozzle gently. Rinse it under warm water to remove any debris. Use a soft brush to scrub the openings, ensuring no residue is left behind. It’s vital to check for clogs that could affect performance. A study from the Agricultural Equipment Research Institute shows that 30% of sprayer issues stem from clogged nozzles. This step is critical in prolonging the sprayer’s lifespan.

After cleaning, reassemble the nozzle carefully. Test it with plain water to ensure proper functioning before using any solutions. If the spray pattern isn’t uniform, reflect on your cleaning process. Sometimes the simplest steps are overlooked. Keeping a regular cleaning schedule is crucial; neglecting this can lead to subpar results. Making cleaning a habit will enhance the sprayer’s reliability and your overall productivity.

Rinsing and Drying the Nozzle After Cleaning

Cleaning a plastic mist sprayer nozzle may seem daunting, but rinsing and drying it afterward is crucial for good performance. After disassembling the nozzle, rinse it thoroughly with warm water. This helps remove residue and grime that builds up over time. Pay attention to small crevices where dirt can hide. Using a soft brush can enhance the cleaning process, allowing you to get into those narrow areas.

Once you've rinsed the nozzle, it’s essential to dry it properly. Leaving moisture can lead to mold growth or clogging. Use a clean, lint-free cloth to pat the nozzle dry. If you’re in a hurry, let it air dry in a well-ventilated area. This method improves reliability when you put the nozzle back to use.

Sometimes, even after thorough rinsing, the nozzle may not work perfectly. You may encounter issues that require deeper cleaning. Reflecting on your cleaning method can yield improvements for future maintenance. Adjusting your approach each time can ensure better results. Consistent care means a longer life for your sprayer.

Cleaning Effectiveness of Different Solutions for Plastic Mist Sprayer Nozzle

Preventative Measures to Maintain Nozzle Cleanliness

Keeping your plastic mist sprayer nozzle clean is essential for its optimal performance. Regular maintenance can prevent blockages and ensure a consistent spray. One basic yet effective preventative measure is to rinse the nozzle after each use. A quick rinse with water can remove leftover residues. This simple act can save you time on deeper cleaning later.

Using a small brush can help too. Gently scrubbing the nozzle removes dirt without damaging it. It's wise to inspect the nozzle regularly for clogs or build-up. Failing to do so may lead to poor spray performance, which can be frustrating. Remember that prevention is more effective than dealing with a clogged nozzle.

You might notice minor stubborn spots. These can happen even with consistent cleaning. If they do, consider soaking the nozzle in warm soapy water for a better clean. Allowing it to sit helps loosen any grime. However, plan time for this if you notice frequent blockages. Balancing quick rinses with occasional deeper cleans will make a difference.

FAQS

: Why is it important to keep the sprayer nozzle clean?

: A clean nozzle ensures optimal performance. Clogged nozzles can lead to uneven spraying, harming plant health.

How often should I clean my mist sprayer nozzle?

Regular cleaning is essential. Clean after every use to prevent blockages and maintain efficiency.

What is the first step in cleaning the nozzle?

Gently disassemble the nozzle. Rinse it under warm water to remove debris and residues before scrubbing.

Can a dirty nozzle impact the spray pattern?

Yes, a dirty nozzle can cause uneven spray. Even tiny blockages can alter how well water and nutrients are delivered.

How can I prevent my nozzle from clogging?

Rinse the nozzle after each use. This simple task can prevent buildup and save time on deeper cleaning later.

What should I do if I see stubborn spots on the nozzle?

Soak the nozzle in warm soapy water. Let it sit to loosen grime, but make time for this as needed.

What materials are recommended for scrubbing the nozzle?

Use a small, soft brush for gentle cleaning. This helps remove dirt without damaging the nozzle.

What might indicate that I need to clean the sprayer again?

If the spray pattern is inconsistent, reflect on your cleaning process. It might require more thorough attention.

How does neglecting the nozzle maintenance affect performance?

Neglect can lead to frustration and reduced efficiency. A dirty nozzle can degrade performance over time.

Should I test the nozzle after cleaning?

Yes, always test with plain water post-cleaning. Ensure the spray is uniform before applying any solutions.

Conclusion

Cleaning a plastic mist sprayer nozzle is essential to ensure optimal performance and longevity of the tool. Understanding the importance of a clean nozzle is the first step in maintaining your sprayer, as a clogged or dirty nozzle can lead to uneven spraying or total failure. To effectively address this, gather the necessary cleaning supplies, which typically include warm water, mild soap, and a soft brush.

When considering how to clean a plastic mist sprayer nozzle at home, follow a simple step-by-step guide: disassemble the nozzle, soak it in soapy water, gently scrub to remove any residue, and rinse thoroughly. After cleaning, ensure the nozzle is properly dried to prevent moisture-related issues. Lastly, adopting preventative measures, such as regular cleaning and proper storage, will help maintain nozzle cleanliness and enhance the overall functionality of your sprayer.

Mason

Mason

Mason is a seasoned marketing professional with a deep expertise in the company's offerings and a passion for driving brand awareness. With a strong background in digital marketing strategies, he has an innate ability to connect with diverse audiences and effectively communicate product benefits.......