How to Test if a Plastic Bottle Is Safe for Essential Oils?

Time:2026-09-20 Author:Madeline
0%

Essential oils can look harmless in a bottle, yet their concentrated compounds may challenge plastic packaging. Citrus oils, terpenes, and phenolic compounds can soften, swell, craze, or extract additives from unsuitable materials. A clear bottle can still fail.

The practical question is, “How to test if a plastic bottle is compatible with essential oils?” Start by identifying the plastic resin, such as HDPE, PET, PP, or LDPE. Do not rely only on the recycling symbol. The U.S. Pharmacopeia, through General Chapters <661.1> and <661.2>, emphasizes material characterization, extractables, leachables, and packaging performance. These principles are useful for essential-oil containers, even when the product is not a medicine. FDA guidance on container-closure systems also recommends evaluating chemical compatibility, protection, and storage conditions.

A simple screening test uses the actual oil, bottle, cap, liner, and closure torque. Fill several samples, leave headspace, and store them upright at room temperature and elevated temperature. Inspect the bottle weekly for softening, whitening, cracks, swelling, leakage, odor changes, and label distortion. Weigh each sample before and after testing. Record color, clarity, and cap fit with photographs. Consider a longer test.

Compatibility is not proven by one successful sample. Oil chemistry, concentration, light, heat, and storage time can change the result. ASTM D471 and related laboratory methods offer useful guidance for testing plastic resistance, but essential oils require product-specific evaluation. When the application is commercial, request supplier data and independent laboratory testing for migration and performance. The honest conclusion may be inconvenient: a cheaper bottle can create a more expensive failure.
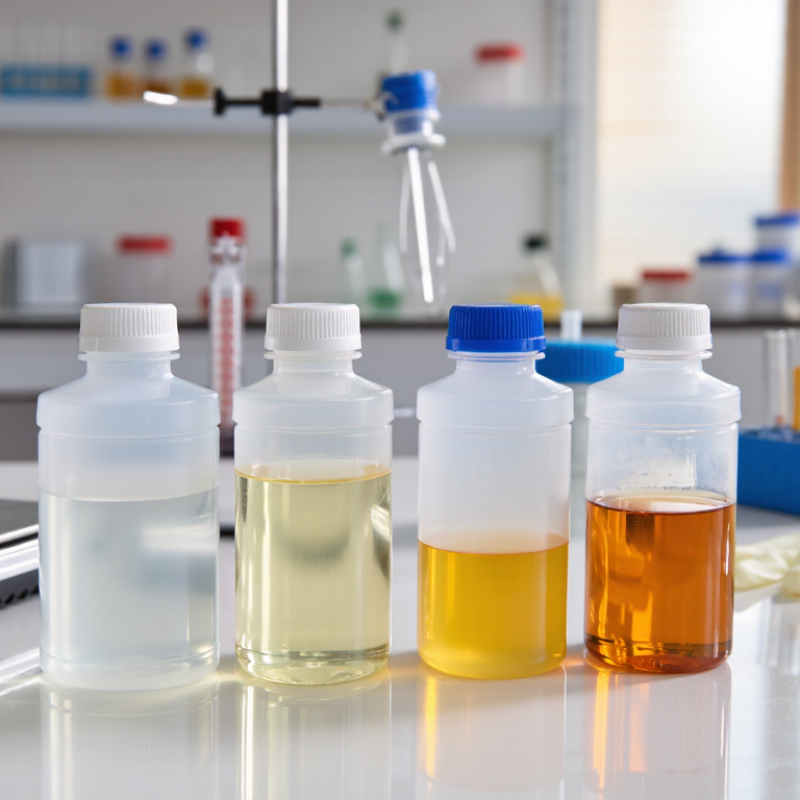
How to Test if a Plastic Bottle Is Safe for Essential Oils?

Identify the Plastic Type and Its Chemical Resistance

How to Test if a Plastic Bottle Is Safe for Essential Oils?

Identify the Plastic Type and Its Chemical Resistance

Start with the resin identification code, usually molded into the bottle base. HDPE and fluorinated HDPE often provide stronger resistance to concentrated oils than many flexible plastics. PET may perform well with some diluted blends, but its resistance can change with oil chemistry, temperature, and storage time. Avoid guessing from appearance. A clear bottle is not automatically compatible.

The PlasticsEurope Plastics—The Fast Facts 2024 report recorded 413.8 million tonnes of global plastic production in 2023. That scale explains why resin identification matters; different polymers have different additives and barrier properties. Check technical data for swelling, softening, cracking, mass loss, and odor transfer. ASTM D543-21 outlines chemical-resistance testing using these visible and measurable changes. USP General Chapter <661.1> also emphasizes physicochemical testing for plastic packaging materials. These standards guide decisions, but they do not guarantee compatibility with every essential oil.

Tips: Put a small amount of the oil into the empty bottle. Keep it sealed for 72 hours at room temperature. Inspect the plastic afterward. Look for haze, warping, tackiness, leaks, or a softened cap. Record the oil, plastic code, temperature, and test duration. I would not trust a recycling symbol alone. That shortcut feels practical, but it is incomplete. When the result is uncertain, use a compatible glass container and test the closure separately.

Check the Bottle’s Condition, Seals, and Intended Use

How to Test if a Plastic Bottle Is Safe for Essential Oils?

Check the Bottle’s Condition, Seals, and Intended Use

A clean bottle is not automatically a safe bottle. I once trusted a clear container because it looked new. That was too casual. Essential oils can soften, swell, or slowly damage certain plastics. Inspect the bottle under bright light. Look for fine cracks, cloudy areas, scratches, sticky patches, or unusual odors. Any distortion means replacement is wiser.

Check the cap, liner, and neck threads carefully. The seal should sit flat and close firmly without forcing it. Add a small amount of the intended oil, then leave it for 24 to 48 hours. Watch for leaks, discoloration, swelling, tackiness, or changes in the oil’s smell. This small trial is useful, but it is not perfect. Longer storage can reveal problems later.

Consider the bottle’s intended use. A diluted blend used briefly may behave differently from concentrated oil stored for months. Plastic type matters, but a recycling symbol alone does not prove compatibility. Ask the container supplier for chemical-resistance information when available. For highly concentrated oils or extended storage, glass is often the more dependable choice. Do not reuse a bottle after visible damage. It may still look acceptable.

How to Test if a Plastic Bottle Is Safe for Essential Oils? - Check the Bottle’s Condition, Seals, and Intended Use

Check Area What to Inspect or Test Acceptable Finding Warning Sign Recommended Decision
Bottle material Check the resin identification code or the supplier’s material specification. Common plastics include HDPE, PP, PET, PVC, and PS. The material is clearly identified and has documented compatibility with the specific essential oil or formulation. The plastic type is unknown, or compatibility is claimed only as “chemical resistant” without test details. Do not rely on appearance alone. Obtain compatibility data or use a material recommended for the exact formulation.
General suitability Compare the essential oil’s composition, concentration, contact time, and storage temperature with the bottle specification. The bottle is specifically intended for the product type and expected storage conditions. The container is intended only for short-term sampling, dry goods, or water-based products. Use only for the stated application. Essential oils should not automatically be assumed compatible with every plastic.
Surface condition Inspect the inside and outside under good lighting before filling. The bottle is clean, dry, smooth, and free from cracks, pinholes, stress marks, whitening, or deformation. Cloudiness, softening, swelling, discoloration, crazing, brittleness, tackiness, or a new chemical odor. Reject the bottle if any physical change is visible or if it has previously held an incompatible chemical.
Closure and seal Check the cap, liner, gasket, insert, and neck finish for fit and material information. The closure fits evenly, the liner is intact, and no liquid escapes when the container is gently inverted. A loose cap, distorted liner, leakage, residue around the neck, or a seal that becomes soft or swollen. Replace the closure or select a compatible seal material; the bottle body alone is not enough.
Small-scale compatibility test Place a small quantity of the actual essential oil or final blend in a sample bottle. Keep a glass sample as a visual reference. No visible change in the plastic, closure, liquid color, clarity, or odor during the planned test period. Leakage, swelling, cracking, weight loss, haze, color change, or a significant change in odor. Treat this as a screening test only. Stop testing and reject the package if any change occurs.
Test duration Test for at least the intended storage period when practical, including the expected temperature range. The package remains stable throughout the planned contact time and storage conditions. A short test passes, but the product will be stored for weeks or months without longer-term evidence. Do not use a brief test to justify long-term storage. Use formal packaging compatibility testing for commercial products.
Temperature and light Expose the filled sample to realistic storage conditions, including normal temperature changes and light exposure where relevant. The bottle and seal remain stable when stored cool, tightly closed, and away from direct sunlight. Heat accelerates softening, swelling, evaporation, and chemical interaction; sunlight may also degrade some oils. Store according to the oil supplier’s instructions and avoid hot vehicles, radiators, and direct sun.
Concentration and formulation Evaluate the complete formula, including neat oil, carrier oil, alcohol, water, surfactants, and other solvents. Compatibility is confirmed for the actual concentration and all ingredients, not just for one diluted sample. The final product contains a higher oil concentration or additional solvents than the tested sample. Repeat the assessment whenever the formula, concentration, bottle, closure, or storage condition changes.
Leak and odor check After filling and closing, place the bottle upright and on its side on an absorbent surface; inspect periodically. No wet spots, oily residue, cap staining, pressure buildup, or unusual plastic odor is present. A strong plastic odor, oil around the closure, or gradual loss of liquid indicates possible interaction or poor sealing. Do not use the package for storage or transport if leakage or odor transfer is detected.
Intended use and safety Determine whether the product is for external use, inhalation, household use, or another application. The packaging is appropriate for the intended use and complies with applicable food, cosmetic, or chemical-contact requirements. The bottle has no use specification, or it is being used for ingestion or skin contact without suitable documentation. Confirm regulatory and safety requirements before use. Packaging compatibility does not make an essential oil safe to ingest or apply.
Final acceptance rule Review the material, condition, closure, test results, formula, and storage plan together. All components remain stable, sealed, and unchanged under the complete intended conditions. Any uncertainty, physical change, seal failure, or missing compatibility evidence. Choose a different container or obtain professional compatibility testing before filling or distributing the product.

Note: Essential oils vary widely in chemical composition, and compatibility depends on the specific oil, concentration, plastic, closure, temperature, and contact time. A visual inspection or short home test cannot guarantee long-term safety.

Compare Essential Oil Compatibility with the Plastic Material

Testing a plastic bottle for essential oils starts with material compatibility, not appearance. Essential oils contain concentrated terpenes that can soften, swell, or stress-crack some plastics. HDPE and PP usually resist many oils better than LDPE. PET can perform well with selected oils, but citrus oils require caution. PVC and unknown soft plastics are poor choices because additives may migrate into the oil.

A practical comparison uses the exact oil, bottle, and closure. Add a small sample, fill the container to normal use level, and store it upright at room temperature. Check the bottle after 24 hours, seven days, and four weeks. Look for clouding, tackiness, warping, odor changes, leaks, or a loose cap.

ASTM D543 uses chemical-exposure testing for plastic resistance, while USP General Chapter <661.1> examines plastic materials and extractables. These standards support professional testing, but a kitchen trial remains limited. NIST Chemistry WebBook lists d-limonene’s boiling point near 176.1°C; that figure does not prove bottle compatibility.

Tips: Test the closure separately. It may contain a liner or seal made from another polymer. Weigh the bottle before and after storage if possible. A noticeable loss suggests evaporation or leakage. Keep a written record with oil type, plastic code, temperature, and exposure time.

My own caution is simple: “no visible damage” is not proof of safety. For long-term storage, glass is usually the more predictable reference material.

Perform a Small-Scale Leakage and Degradation Test

How to Test if a Plastic Bottle Is Safe for Essential Oils?

A small-scale test can reveal leakage, softening, or chemical attack before wider use. Choose the exact plastic bottle, cap, liner, and essential oil planned for production. Clean and dry the bottle, then record its empty weight. Add a measured amount of oil, leaving normal headspace. Tighten the cap gently, and place the bottle upright on white absorbent paper. Keep one empty bottle nearby as a control.

Check the setup after 24 hours, 72 hours, and seven days. Look for wet spots, oily rings, cloudiness, swelling, cracks, or a changed odor. Weigh the bottle again. A noticeable weight loss may indicate evaporation or leakage. Also inspect the cap threads and the bottle shoulder, where stress often appears. I once approved a container after a quick overnight check. It later developed a slight haze. That mistake showed me that short tests can create false confidence.

Tips: Test at room temperature and in a warm, ventilated area, while wearing suitable gloves and eye protection. Avoid direct sunlight and open flames. Use a fresh bottle for each oil, because residues can distort results. Keep clear notes, including dates, temperatures, oil volume, and photographs. A bottle that looks unchanged may still absorb aroma or release unwanted substances. For skin-contact products, confirm compatibility with qualified packaging or safety professionals before use.

Assess Safety Risks Before Storing Essential Oils in the Bottle

How to Test if a Plastic Bottle Is Safe for Essential Oils?

Assessing safety begins with compatibility, not appearance. A bottle may look clean yet soften after several hours. Essential oils contain concentrated compounds that can weaken certain plastics, seals, and cap liners. Food-grade does not automatically mean oil-resistant. Check the bottle’s material, manufacturer data, and intended use before filling it. If reliable information is unavailable, long-term storage is a poor experiment.

Pour a small amount of the diluted oil into the bottle, then seal it tightly. Keep it upright at room temperature for 24 to 72 hours. Examine the plastic for clouding, swelling, cracks, stickiness, or color changes. Smell the outside carefully. A strong transferred odor may indicate absorption. Check for leaks around the cap and threads. My early mistake was testing only the bottle body. The closure failed first. Results can also vary between different oils, concentrations, and temperatures.

Tips: Label the test date and oil mixture. Use a clean control bottle for comparison. Do not heat the sample or leave it in direct sunlight. If the container changes in any way, stop using it. When compatibility remains uncertain, choose a properly tested container designed for concentrated aromatic products, and avoid storing the mixture for extended periods. A short trial cannot prove permanent safety. It only reveals obvious warning signs.

How to Test if a Plastic Bottle Is Safe for Essential Oils?

General compatibility screening for common bottle materials. A higher score indicates better resistance for storing undiluted essential oils; it is not a substitute for laboratory testing.

How to test: Fill a sample bottle with the intended essential oil, seal it, and inspect it after 24 hours, 7 days, and 30 days. Stop using the bottle if it becomes cloudy, soft, swollen, cracked, sticky, discolored, or develops leaks. Glass is generally the safer long-term option, while HDPE and PP require oil-specific verification.

FAQS

Does a clean plastic bottle automatically suit essential oils?

No. Inspect it under bright light for cracks, clouding, scratches, sticky patches, or unusual odors.

Which plastic types usually resist essential oils better?

HDPE and PP generally perform better than LDPE. PET may work with selected oils, but citrus oils need caution.

Which plastic materials should be treated cautiously?

Avoid unknown soft plastics and PVC when possible. Additives may migrate into the oil.

How can I perform a basic compatibility test?

Add a small amount of the intended oil. Store it upright at room temperature for 24 to 48 hours.

What signs show that the bottle is reacting badly?

Check for swelling, clouding, tackiness, warping, leaks, loose caps, or changed oil odors.

Should I test the cap and seal separately?

Yes. The closure may use a different material. Confirm that the liner sits flat and closes firmly.

Is a recycling symbol enough to prove safety?

No. The symbol identifies a plastic category, but it does not guarantee compatibility with every oil.

How should I check longer storage?

Inspect the bottle after 24 hours, seven days, and four weeks. Record the oil, plastic type, temperature, and dates.

Is a short home test completely reliable?

Not completely. Slow damage may appear later, so longer storage still deserves caution.

When is glass the better choice?

Glass is often more predictable for concentrated oils or storage lasting several months. I would not reuse visibly damaged plastic.

Conclusion

Choosing the right plastic container for essential oils requires more than checking its appearance. To understand how to test if a plastic bottle is compatible with essential oils, first identify the plastic type and review its chemical resistance. Examine the bottle for cracks, cloudiness, odors, weak seams, or damaged seals, and confirm that it is designed for liquid storage. Different essential oils may react differently with plastics, so compatibility should be considered carefully rather than assumed.

Before storing a larger amount, conduct a small-scale test by placing a limited quantity of essential oil in the bottle and observing it over time. Check for leakage, softening, swelling, discoloration, stickiness, or changes in the oil’s smell and appearance. If any deterioration occurs, discontinue use immediately. A suitable container should remain stable, tightly sealed, and free from visible chemical changes. These precautions help reduce contamination, spills, and potential skin or environmental exposure while supporting safer storage decisions.

Madeline

Madeline

Madeline is a dedicated marketing professional with a wealth of expertise in our company's core offerings. With a keen understanding of the industry, she brings a unique perspective to her role, consistently delivering high-quality content that highlights the superior aspects of our products. As......